Robin
Pause and Play the video to drawing and paint along with me.
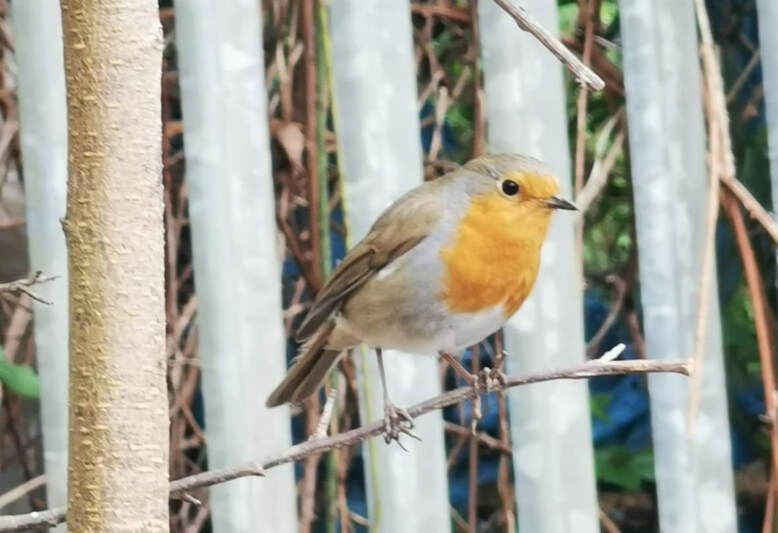
Photo Referance of the Robin.
Photo Referance taken by my daughter Jasmin Gale, at our Alloment in Cardiff, Winter 2020. Our Robin is by us all of the time looking out for worms, very friendly and tame.
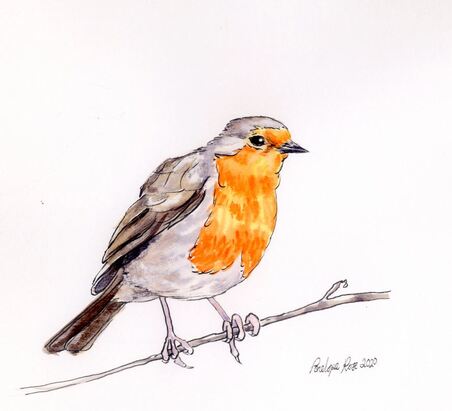
Robin, Watercolour, Pen and Ink
Transcript for the Demo Video of the Robin with Watercolour, Pen and Ink.
At the beginning of lockdown 2020 I began making demo videos to accompany my online art classes. This one of the Robin is one of the first and a of a few that I added full instructions to with the video, and here is the full transcript-
0:00 Robin Red Breast
Pen and Ink with a
Watercolour Wash
By Penelope Rose Cowley
www.peneloperosecowley.com
0:06 Photo reference taken by my daughter Jasmin, at our Allotment
in Cardiff. Our Robin is by us all the time looking out for worms,
very friendly and tame. Click link in the description
to view and save the image.
0:11 Materials: HB pencil, putty rubber, pen and waterproof ink,
watercolours, selections of round brushes, 300gsm watercolour
paper, palettes, 2 jars of water, masking tape and drawing board.
0:18 Sketch a diagonal line, from the top of the head
through to the tip tail feathers. Draw an oval shape
for the head. Cross a tilted horizontal line through
the centre of the oval and slightly beyond the face
for the centre of the beak.
0:28 Draw a small circle on the right of the cross and
a diamond shape for the beak like so.... and two
curved lines for the front and back of the neck.
0:33 Sketch an oval for the main part the body, slightly
overlapping the oval for the head. Approx.
2/3's of the oval is on the right side of the long
diagonal line. The width is approx. 2x that of the
head and 3x for the height.
0:38 Mark a point beneath the back of the head
on the underside on the large oval of the body.
0:43 Sketch the leg.
0:46 Draw the wing, on the left side of the diagonal long
line. Separate in to the 3 main sections of a wing.
Coverts
Secondary feathers
Primary feathers
0:52 Sketch the rump at the base of the oval to the
right of the long diagonal line. Then, draw the tail
feathers on either side of that line.
0:56 Now you can begin to add details, by outlining the
sections - the red breast, feathery edges,
overlapping feathers, the feet and the branch
etc...
1:36 Use a putty rubber to remove the guidelines,
but keep the details you have just drawn.
2:04 Sketch in over the
remaining details with pen and ink. I use
a dip pen, however any waterproof fine liner
pen will do.
2:11 Try to make a broken line with mark making
and texture. (not just single continuous lines)
3:15 Leave a little white area in the eye, off
centre and ink in around it to create a
refraction of light.
3:31 Single hatched lines are good
for areas in shade.
3:34 Prepare watercolours- Mix ultramarine and
burnt sienna together to create a variety
of greys warm and cool, like so...
(I have covered the Robin to protect
from splashes)
4:13 Remove the remaining pencil lines with
the putty rubber.
4:25 Wet in Wet wash- Use clean water a round brush
to wet the section between the red breast and
wing area, the middle section.
4:39 Lift and tilt the board to move
water across the area evenly.
4:47 Load a damp medium round brush
with a little grey and drop into the back of
the head and body of our Robin leaving
some white areas too.
4:59 Add hints of warmer grey
here and there. To lighten or remove a little of the paint, use an
almost dry brush and touch the area to lighten,
to 'Lift Off' the paint.
5:07 Repeat the Wet in Wet wash technique for
the wing and tail. Use a variety of the greys
and grey/brown.
5:40 Wet the branch and drop in a little grey,
here and there to spread randomly.
5:59 Prepare Watercolour- Cadmium Yellow and
Orange for the Red Breast and Cadmium Red,
Cadmium Red/Grey for the legs and feet.
6:13 Wet the legs and feet with a little clean
water, then with a small round brush drop
in a little Cadmium Red followed with red/grey
for shadow and texture.
6:29 Wet in Wet wash for the red breast area.
Use clean water to wet the area. Then
paint in with the deep yellow.
6:43 Now load the brush with orange mixed with a
little water and brush in the wet in wet
yellow area to create the texture of feathers,
with a small round brush.
6:59 Continue to create the texture of feathers,
with a small round brush and vary the orange
by mixing it with a little yellow and water.
7:11 With a small almost dry round brush, load a
little dark grey and add emphasise and detail
to shadow and dark areas.
7:19 Dry Brush - Use a dry brush with the bristles
separated to apply a little dark grey, gently
to the surface of the paper to create a
little texture and details here and there
on to our Robin.
7:40 The Robin is now complete! Lovely.
7:56 Thank you for watching.
YouTube
Subcribe to my YouTube channel to see the art in progress. Many quick hyperlasped paintings in a variety of mediums that I use to accompany the tuition for art courses and classes.
|
|

